






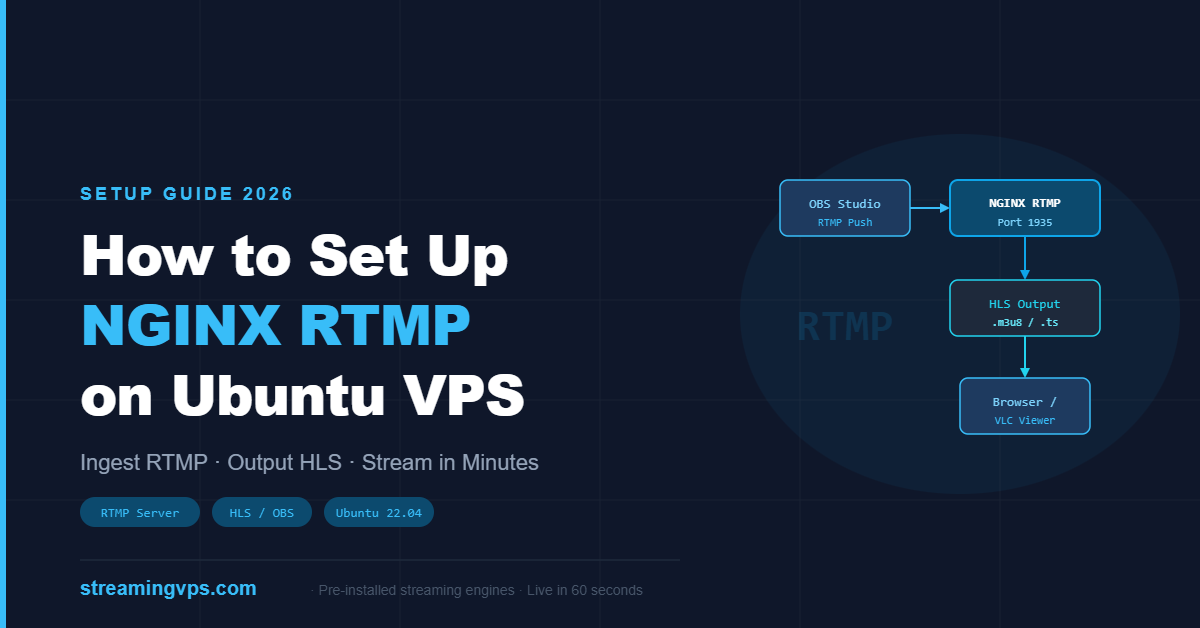
Setting up an NGINX RTMP VPS is one of the most cost-effective ways to run your own live streaming infrastructure. NGINX with the RTMP module lets you ingest RTMP streams from OBS or any encoder, re-package them as HLS for browser playback, and relay to multiple destinations — all from a single server you control.
This guide walks through the full setup on Ubuntu 22.04. By the end, you’ll have a working RTMP ingest point, HLS output, and a basic stream key system. If you’d rather skip the manual work, StreamingVPS.com ships VPS instances with NGINX RTMP pre-installed and configured — live in 60 seconds.
What Is the NGINX RTMP Module?
NGINX is a high-performance web server. The nginx-rtmp-module adds a full RTMP server on top of it. Together they can:
- Accept RTMP push from OBS Studio, FFmpeg, or any RTMP encoder
- Transcode or re-package streams to HLS (HTTP Live Streaming) and DASH
- Record streams to disk as FLV or MP4
- Relay (push) to Twitch, YouTube, or Facebook simultaneously
- Support multiple stream keys for multi-tenant setups
It’s not as feature-rich as Wowza or Ant Media, but it’s open-source, lightweight, and handles thousands of concurrent HLS viewers on modest hardware.
Prerequisites
- Ubuntu 22.04 VPS (1 vCPU / 1 GB RAM minimum; 2 vCPU / 2 GB recommended for transcoding)
- Root or sudo access
- A domain or public IP pointing to the server
- Ports 1935 (RTMP) and 80/443 (HTTP/HLS) open in your firewall
Step 1 — Install NGINX with the RTMP Module
Ubuntu’s default NGINX package does not include the RTMP module. You have two options:
Option A: Install from libnginx-mod-rtmp (easiest)
sudo apt update
sudo apt install nginx libnginx-mod-rtmp -y
This pulls the RTMP module as a dynamic module. Verify it’s present:
nginx -V 2>&1 | grep rtmp
# Should show: --add-dynamic-module=... rtmp
Option B: Compile from source (more control)
sudo apt install build-essential libpcre3 libpcre3-dev libssl-dev zlib1g zlib1g-dev git -y
cd /tmp
git clone https://github.com/arut/nginx-rtmp-module.git
wget http://nginx.org/download/nginx-1.25.3.tar.gz
tar -zxvf nginx-1.25.3.tar.gz
cd nginx-1.25.3
./configure --with-http_ssl_module --add-module=../nginx-rtmp-module
make && sudo make install
Option A is sufficient for most RTMP server hosting use cases. Use Option B if you need specific NGINX version control or extra modules.
Step 2 — Configure NGINX RTMP
Edit (or create) /etc/nginx/nginx.conf. Add the RTMP block outside the http {} block:
load_module modules/ngx_rtmp_module.so;  # Only needed for dynamic module (Option A)

worker_processes auto;

events {
    worker_connections 1024;
}

rtmp {
    server {
        listen 1935;
        chunk_size 4096;

        application live {
            live on;
            record off;

            # HLS output
            hls on;
            hls_path /var/www/html/hls;
            hls_fragment 3;
            hls_playlist_length 60;
        }
    }
}

http {
    sendfile off;
    tcp_nopush on;
    directio 512;

    server {
        listen 80;

        location /hls {
            types {
                application/vnd.apple.mpegurl m3u8;
                video/mp2t ts;
            }
            root /var/www/html;
            add_header Cache-Control no-cache;
            add_header Access-Control-Allow-Origin *;
        }

        location /stat {
            rtmp_stat all;
            rtmp_stat_stylesheet stat.xsl;
        }
    }
}
Create the HLS output directory and set permissions:
sudo mkdir -p /var/www/html/hls
sudo chown -R www-data:www-data /var/www/html/hls
Test the config and reload:
sudo nginx -t
sudo systemctl reload nginx
sudo systemctl enable nginx
Step 3 — Open Firewall Ports
If you’re using UFW:
sudo ufw allow 1935/tcp   # RTMP ingest
sudo ufw allow 80/tcp     # HLS playback
sudo ufw allow 443/tcp    # HTTPS (if using TLS)
sudo ufw reload
If your VPS provider has a cloud firewall (Security Groups, etc.), also open port 1935 TCP there.
Step 4 — Configure OBS Studio to Push to Your NGINX RTMP VPS
In OBS Studio:
- Go to Settings → Stream
- Set Service to
Custom - Server:
rtmp://YOUR_SERVER_IP/live - Stream Key: anything you like (e.g.
mystream) - Click OK and hit Start Streaming
Your RTMP ingest URL is now: rtmp://YOUR_SERVER_IP/live/mystream
HLS playback URL: http://YOUR_SERVER_IP/hls/mystream.m3u8
You can test playback in VLC (Media → Open Network Stream) or embed using Video.js / HLS.js in a web page.
Step 5 — Enable HLS Playback in a Browser
NGINX RTMP outputs standard HLS segments (.ts files + .m3u8 playlist). To embed in a web page, use HLS.js:
<video id="video" controls></video>
<script src="https://cdn.jsdelivr.net/npm/hls.js@latest"></script>
<script>
  const video = document.getElementById('video');
  if (Hls.isSupported()) {
    const hls = new Hls();
    hls.loadSource('http://YOUR_SERVER_IP/hls/mystream.m3u8');
    hls.attachMedia(video);
  }
</script>
Safari supports HLS natively, so no JavaScript library is needed there.
Stream Key Authentication (Optional but Recommended)
By default, anyone who knows your server IP can push to it. To add stream key validation, use NGINX’s on_publish callback:
application live {
    live on;
    on_publish http://localhost/auth;
}
Create a small auth endpoint (Node.js, PHP, Python — anything) at /auth that returns 200 for valid keys and 404 for invalid ones. NGINX RTMP will allow or reject the push accordingly.
Common Issues and Fixes
Stream connects but no HLS output: Check that /var/www/html/hls exists and is writable by www-data. Confirm hls on is inside the application block, not outside it.
Port 1935 connection refused: NGINX may not be running: sudo systemctl status nginx. Firewall may be blocking: sudo ufw status. Cloud firewall security group may not allow 1935.
High CPU on transcoding: NGINX RTMP does not transcode by default — it re-packages. CPU spikes usually mean you’re pushing a very high bitrate stream. Consider using FFmpeg via exec for adaptive bitrate ladders, or switching to Ant Media Server which has built-in adaptive bitrate.
RTMP works but HLS lags: Decrease hls_fragment to 2 seconds and hls_playlist_length to 30 seconds for lower latency. For sub-2-second latency, consider switching to Low-Latency HLS (LL-HLS) or SRT with a dedicated streaming server.
NGINX RTMP vs Managed Streaming Engines
NGINX RTMP is powerful but raw. Here’s what you trade off compared to a managed engine like Wowza or Ant Media:
| Feature | NGINX RTMP | Wowza / Ant Media |
|---|---|---|
| Setup time | 30–60 min | 60 seconds (pre-installed VPS) |
| Adaptive bitrate | Manual (FFmpeg) | Built-in |
| WebRTC support | No | Yes (Ant Media) |
| Web dashboard | Stats page only | Full GUI |
| SRT ingest | No (native) | Yes |
| Support | Community | Commercial |
For developers who want full control and don’t need WebRTC or adaptive bitrate out of the box, NGINX RTMP is an excellent choice. For production streaming with multiple quality levels and a web dashboard, a managed engine on a pre-configured RTMP server hosting plan saves significant time.
Conclusion
Setting up NGINX RTMP on a VPS is straightforward once you know the right steps: install the module, configure the RTMP and HTTP blocks, open port 1935, and point OBS at your server. You get a reliable RTMP ingest → HLS output pipeline with full control over your infrastructure.
If you want to skip the setup entirely, StreamingVPS.com offers VPS instances with NGINX RTMP pre-installed, configured, and ready to stream — no SSH required to get started. Check the pricing page and go live in 60 seconds.